Common Reasons Unconnected to Kinkaid Wi-Fi
- Inadvertently on Guest Wi-Fi: Reinstall the Kinkaid Secure Wi-Fi profile.
- Wi-Fi is disabled: Make sure your Wi-Fi is enabled.
- Device needs to be restarted: Restart your device.
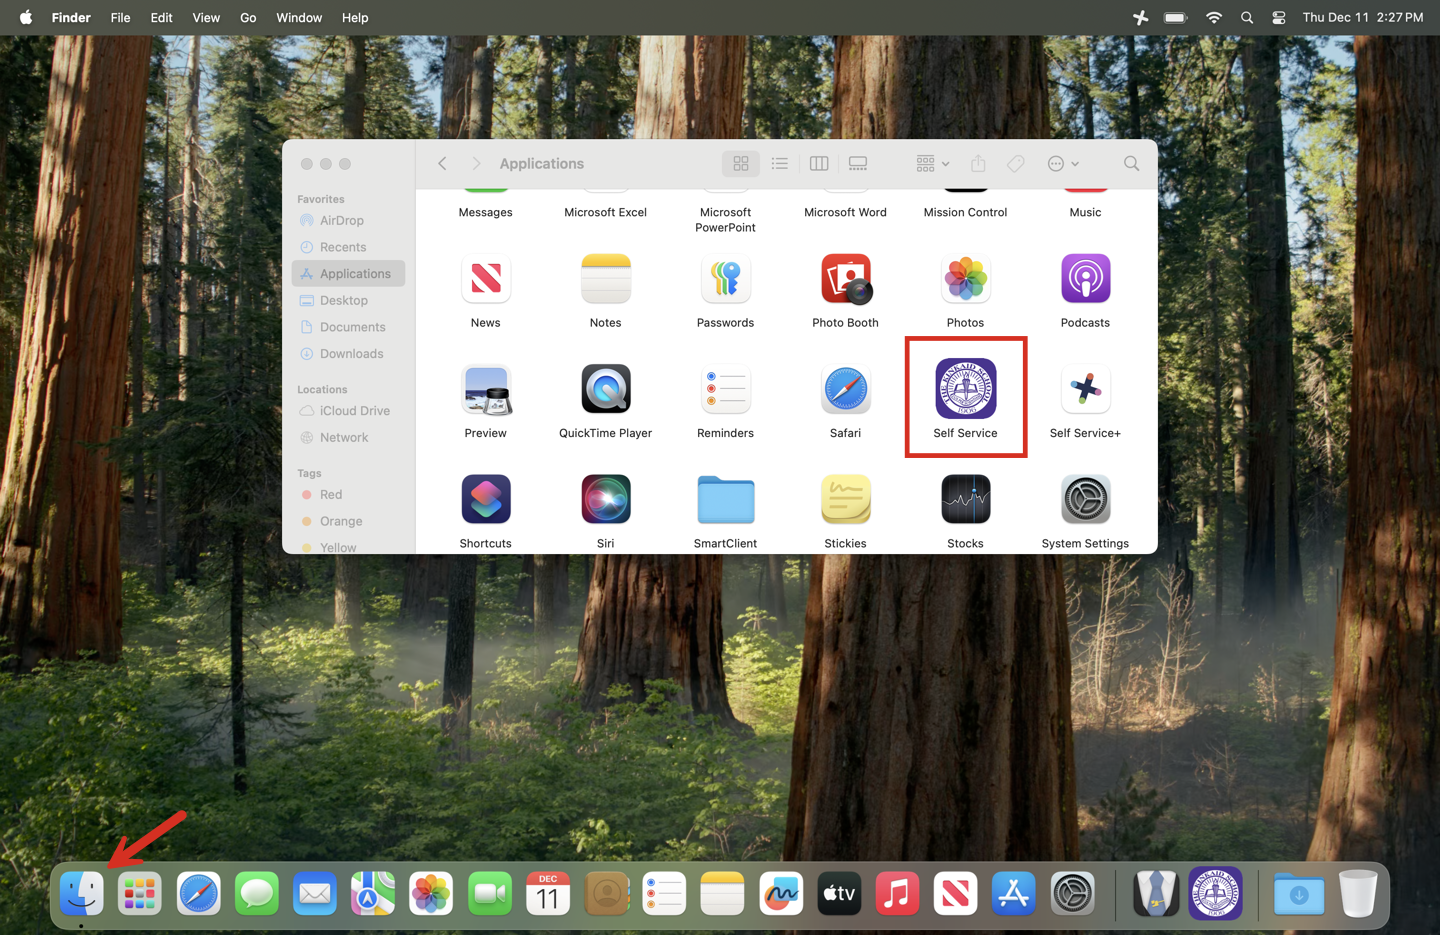
1. Open the Self Service App.
- Open Finder.
- Go to Applications.
- Locate and open Self Service.
2. Remove the Existing Kinkaid Secure WiFi Profile.
- In Self Service, navigate to the Wireless Profiles category on the left menu.
- Click Remove to delete the existing secure WiFi profile.

3. Reinstall the Kinkaid Secure WiFi Profile
- Still in Self Service, select the option to Reinstall the Secure WiFi Profile.
- You will know it is completed when the Install button turns to Done.

Still having issues? Please email us at helpdesk@kinkaid.org